Grote dingen in het bedrijfsleven worden nooit door één persoon gedaan. Ze worden gedaan door een team van mensen. We hebben die dynamische groep mensen
This article explores how to connect an LCD scherm naar een Framboos Pi using an HDMI bestuurdersbord, essentially turning your single-board computer into a miniature HDMI display screen. Whether you’re looking to create a custom weergave for a project, build a portable gaming system, or simply repurpose an old laptop screen, this gids provides a comprehensive overview of the process. It’s worth reading because it breaks down the technical jargon, offers step-by-step instructions, and highlights potential pitfalls to avoid, empowering even novice users to complete this exciting DIY project.
De Framboos Pi, a versatile single-board computer, offers a world of possibilities for DIY projects. Connecting it to an HDMI LCD weergave expands these possibilities even further.
Firstly, an HDMI LCD allows you to build embedded systems. Imagine creating a custom control paneel for a smart home, a portable retro gaming console, or a dedicated weergave for sensor data. The compact size and low power consumption of the Framboos Pi, combined with an LCD scherm, make this feasible. Secondly, using an HDMI LCD can be more cost-effective than purchasing a pre-built monitor. You can often find bouwpakketten that include the LCD paneel En bestuurdersbord at a reasonable price, especially if you’re comfortable with a little assembly.
The three essential components for this project are the LCD paneel, de bestuurdersbord, en de HDMI kabel. De LCD paneel is the actual beeldscherm itself. It requires a bestuurdersbord to translate the HDMI signaal van de Framboos Pi into a format the LCD paneel can understand.
De bestuurdersbord is a crucial piece of tech. It takes the digital HDMI input and converts it to the analog signals needed to control the pixels on the LCD scherm. It also handles tasks like adjusting brightness, contrast, and color. Finally, the HDMI cable connects de Framboos Pi naar de bestuurdersbord, transmitting the videosignaal. Ensure you choose a compatible HDMI kabel for optimal signaal transmission.
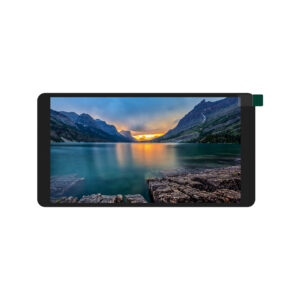
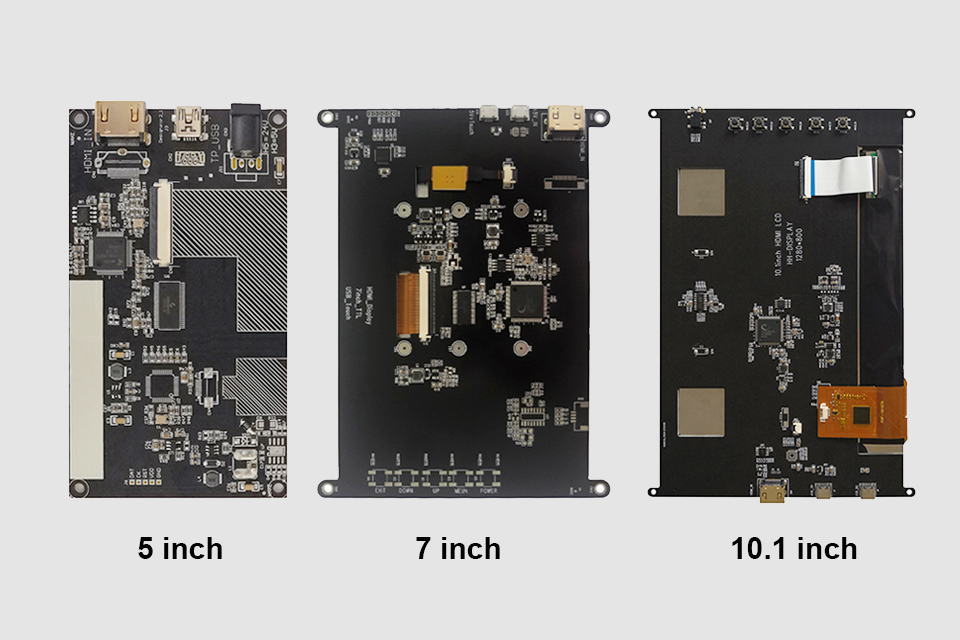
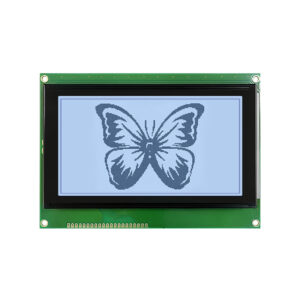
The size of the LCD scherm depends entirely on your project requirements. A 7 inch LCD scherm is een populaire keuze voor Framboos Pi projects due to its balance of portability and visibility. It’s large enough to display text and graphics clearly, yet small enough to be easily integrated into custom enclosures.
However, you can find LCD schermen in various sizes, from smaller 3.5-inch beeldschermen to larger 10-inch or even larger panelen. Consider the intended application. For a handheld gaming console, a smaller scherm might be preferable. For a desktop beeldscherm alternative, a larger weergave would be more suitable. Also, think about the resolution. Higher resolution schermen provide sharper images, but they also require more processing power from the Framboos Pi.
Here’s a table summarizing common LCD screen sizes and their typical applications:
| Schermgrootte | Typische toepassingen | Voordelen | Nadelen |
|---|---|---|---|
| 3.5 inch | Small embedded systems, portable displays | Very compact, low power consumption | Small screen real estate, limited resolution |
| 7 inch | Portable gaming consoles, DIY tablets, control panels | Good balance of size and portability, reasonable cost | May be too small for some desktop applications |
| 10 inch | Desktop monitor alternatives, larger embedded systems | Larger screen real estate, better for viewing video | Less portable, higher power consumption |
De juiste selecteren bestuurdersbord is vital for a successful project. While VGA beeldschermen were common, HDMI is the preferred invoer method for modern Framboos Pi projects. HDMI provides a higher-quality digitaal video signaal vergeleken met VGA’s analog signal. This results in a sharper, clearer afbeelding.
When choosing a bestuurdersbord, check for compatibility with your LCD paneel and your Framboos Pi. De bestuurdersbord must steun the resolution and interface of your LCD paneel. De meeste LCD bouwpakketten come with a bestuurdersbord specifically designed for the included paneel. Also, ensure the bestuurdersbord has the necessary invoer ports, such as HDMI, and that it’s compatible with the Raspberry Pi's HDMI output.

When you receive your new HDMI LCD kit, the excitement is palpable. The unboxing process is crucial to ensure that you have all the necessary components and that everything works properly. Typically, an HDMI LCD kit will contain the following:
Before proceeding, check each item carefully for any physical damage. Inspect the LCD scherm for scratches or cracks. Ensure all kabels are present and in good condition. A quick visual inspection can prevent headaches later.
Now comes the exciting part: connecting de LCD bestuurdersbord naar jouw Framboos Pi. Here’s a step-by-step gids:
After 1 step, your Framboos Pi should automatically detect the HDMI weergave and output video naar de LCD scherm.
Providing adequate stroom is crucial for the stability of your HDMI LCD setup. The LCD paneel en de bestuurdersbord both require stroom, and their stroom requirements can vary depending on the size and type of weergave.
De bestuurdersbord typically requires a separate stroom supply, often a DC adapter with a specific voltage (e.g., 12V) and amperage (e.g., 2A). Check de specificaties van jouw bestuurdersbord to determine the correct stroom requirements. Using an incorrect stroom supply can damage the bestuurdersbord of LCD paneel.
De Framboos Pi itself also needs stroom. While it can sometimes stroom smaller beeldschermen through its GPIO pins, it’s generally recommended to gebruik a separate stroom levering voor de LCD to avoid straining the Raspberry Pi's stroom circuitry.
Sometimes, things don’t go as planned. Here are some common issues and how to fix them:
/boot/config.txt). Detail instructions on how to do this can be found online.Once you have a working HDMI LCD setup, you can explore additional enhancements. Adding aanraken functionality is a popular option, turning your weergave into a full-fledged aanraakscherm.
Touch scherm functionality typically requires a separate aanraken controllerbord Dat connects naar de LCD paneel en de Framboos Pi. Deze planken often use USB for communication. After physically connecting de aanraken controllerbord, you’ll need to install the appropriate drivers on your Framboos Pi. There are number of ready to gebruik driver available.

Het vinden van de juiste HDMI LCD bouwpakket of bestuurdersbord can be overwhelming with so many options available. Here’s a gids to help you navigate the purchasing process:
Connecting an HDMI LCD naar een Framboos Pi opens up a world of creative possibilities. By understanding the components involved, following the connection steps carefully, and troubleshooting common issues, you can transform your Framboos Pi into a versatile HDMI monitor.
10 Important Things to Remember:

This article dives into the exciting world of augmented reality (ar) lenses, specifically focusing on the development and potential of an interchangeable lens system for ar glasses.

This article explores how to connect an LCD screen to a Raspberry Pi using an HDMI driver board, essentially turning your single-board computer into a miniature HDMI monitor.

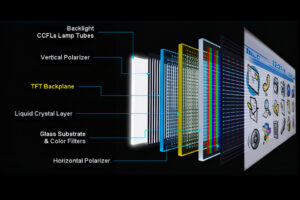
This article dives deep into the lifespan and durability of OLED (Organic Light Emitting Diode) displays compared to LCD (Liquid Crystal Display) screens.

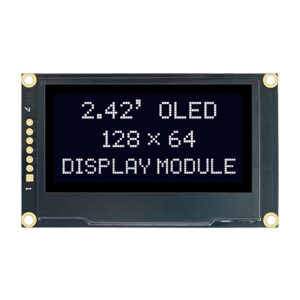
This article dives into the fascinating realm of small OLED displays, exploring their unique characteristics, applications, and the technology that makes them possible.
In dit artikel duiken we in de wereld van beeldschermen, met specifieke aandacht voor LCD-technologie.
This article explores how to connect an LCD screen to a Raspberry Pi using an HDMI driver board, essentially turning your single-board computer into a miniature HDMI monitor.

This article dives into the exciting world of augmented reality (ar) lenses, specifically focusing on the development and potential of an interchangeable lens system for ar glasses.

This article dives deep into the lifespan and durability of OLED (Organic Light Emitting Diode) displays compared to LCD (Liquid Crystal Display) screens.