Great things in business are never done by one person. They’re done by a team of people. We have that dynamic group of peoples
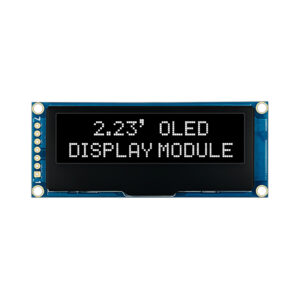
OLED display modules, particularly graphic OLED variants, are revolutionizing the way we interact with devices, offering crisp visuals, vibrant colors (in some cases), and exceptional energy efficiency. This article explores the fascinating world of OLED graphic display modules, with a specific focus on those utilizing the popular SSD1306 controller and interface options for seamless integration with Arduino and other microcontrollers. We’ll unravel the technical intricacies of these displays, compare them with traditional LCDs, and guide you through the process of harnessing their power for your projects. This article is worth reading because it provides a comprehensive understanding of OLED display technology, practical insights into using them with Arduino, and a detailed look at different resolutions like 128×64 and 128×32, as well as popular sizes like 0.91 inch, 0.96 inch, and 1.5 inch. If you’re an electronics hobbyist, a seasoned maker, or simply curious about the latest in display technology, this deep dive will equip you with the knowledge to illuminate your projects with stunning visuals, using our graphic OLED display module.
An OLED display module is a type of flat panel display that utilizes organic light-emitting diodes (OLEDs) to produce images. Unlike traditional liquid crystal displays (LCDs) that require a backlight, each pixel in an OLED display generates its own light. This fundamental difference leads to several significant advantages, including superior image quality, high contrast ratios, wide viewing angles, and faster response times. OLED displays are also known for their ability to produce black color, which enhances the overall visual experience. This technology allows creation of extremely light and almost paper-thin devices, they also can be flexible.
OLED display technology is a game-changer because it offers a more immersive and visually stunning viewing experience compared to older display technologies. The ability of OLED displays to achieve deep black levels and vibrant colors makes them ideal for a wide range of applications, from smartphones and televisions to wearables and automotive displays. Moreover, OLED displays have lower power consumption than LCD displays, especially when displaying darker content, which is beneficial for battery-powered devices. Their flexible nature also opens up new design possibilities, enabling the creation of curved and foldable devices. These are the reasons why OLED displays are available on the market and gaining popularity.
The SSD1306 is a powerful single-chip CMOS OLED driver that has become extremely popular for controlling graphic OLED displays, especially in the DIY and maker communities. This controller is designed to drive monochrome OLED panels with resolutions up to 128×64 pixels, although it can also be used with lower resolution displays like 128×32. Several factors contribute to the SSD1306’s popularity. One key advantage is its versatility. The SSD1306 supports both SPI and I2C interfaces, providing flexibility in how it connects to microcontrollers like the Arduino. This single-chip CMOS OLED driver controller simplifies the circuitry needed to drive an OLED panel.
Furthermore, the SSD1306 is well-documented, with readily available datasheets and application notes. This makes it relatively easy for developers to understand how to use the controller and integrate it into their projects. Numerous libraries, such as the Adafruit SSD1306 and Adafruit GFX library, are available for various platforms, including Arduino, simplifying the process of displaying text and graphics on SSD1306-controlled OLED displays. Adafruit offers great community and team support to its customers. The combination of its features, ease of use, and strong community support makes the SSD1306 an excellent choice for driving small to medium-sized graphic OLED displays.
Interfacing an OLED display module with an Arduino is a relatively straightforward process, thanks to the availability of libraries and the SSD1306 controller’s support for both I2C and SPI communication protocols.
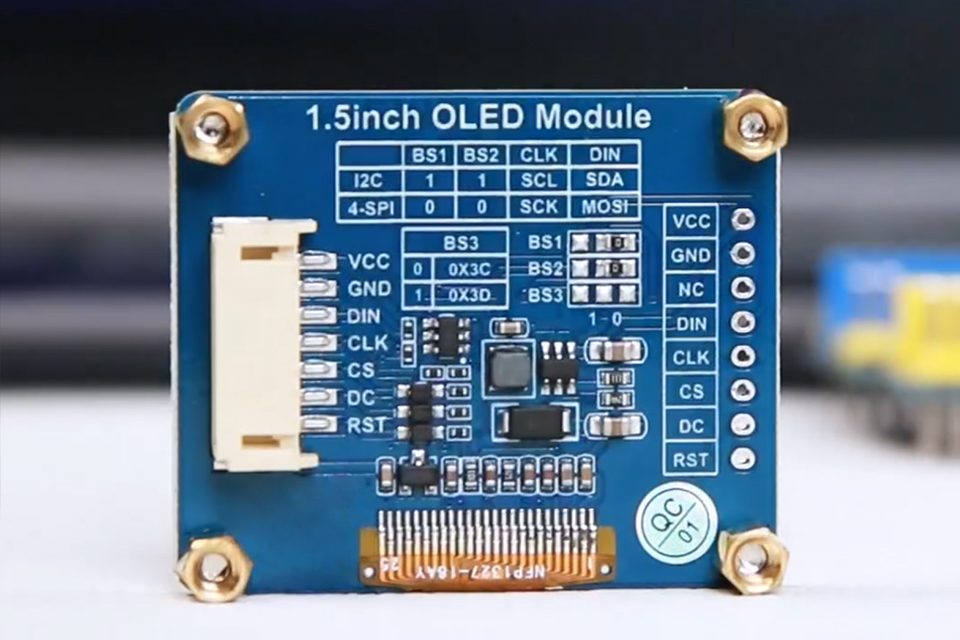
I2C OLED: The I2C (Inter-Integrated Circuit) interface is a two-wire serial communication protocol that is commonly used for connecting low-speed peripherals to microcontrollers. I2C OLED displays typically have four pins: VCC (power), GND (ground), SDA (serial data), and SCL (serial clock). To use an I2C OLED display with an Arduino, you’ll need to connect these pins to the corresponding pins on the Arduino board. You might need a dedicated header. Most Arduino boards have dedicated I2C pins (A4 for SDA and A5 for SCL on the Uno). You’ll also need to know the I2C address of your OLED display, which is usually specified in the datasheet or can be found using an I2C scanner sketch. You should also install the library that supports your device, for example from Adafruit. I2C uses a master-slave architecture, where the Arduino typically acts as the master and the OLED display as the slave. The I2C protocol allows multiple devices to share the same bus, as long as each device has a unique address.
SPI OLED: The SPI (Serial Peripheral Interface) interface is a synchronous serial communication protocol that is often used for higher-speed communication than I2C. SPI OLED displays typically have more pins than I2C versions, including MOSI (Master Out Slave In), MISO (Master In Slave Out), SCK (Serial Clock), CS (Chip Select), D/C (Data/Command), and sometimes RST (Reset). To use an SPI OLED display with an Arduino, you’ll need to connect these pins to the appropriate digital pins on the Arduino. You may use library manager to download dedicated SPI libraries. SPI is generally faster than I2C, which can be advantageous for applications that require frequent screen updates or animations.
Whether you choose I2C or SPI, you’ll typically use a library like the Adafruit SSD1306 library to simplify the process of sending commands and data to the OLED display. These libraries provide functions for initializing the display, set the brightness, drawing pixels, lines, shapes, and text.
Resolution is a crucial factor to consider when choosing an OLED display module. It determines the number of pixels on the screen and directly impacts the sharpness and detail of the displayed content. Here’s a comparison of three common resolutions for graphic OLED displays:
| Resolution | Pixels | Aspect Ratio | Typical Size (Diagonal) | Suitable for |
|---|---|---|---|---|
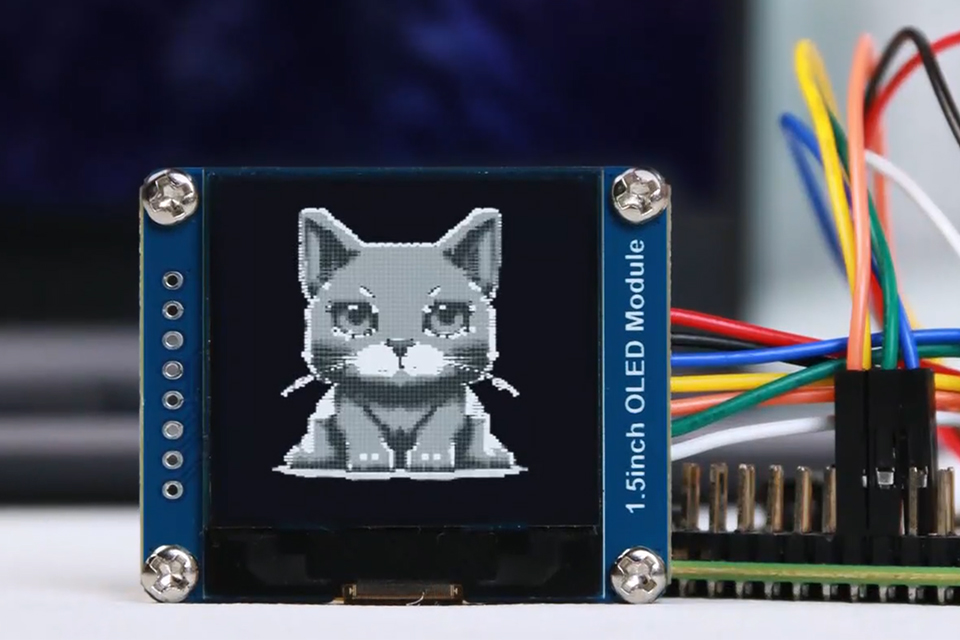
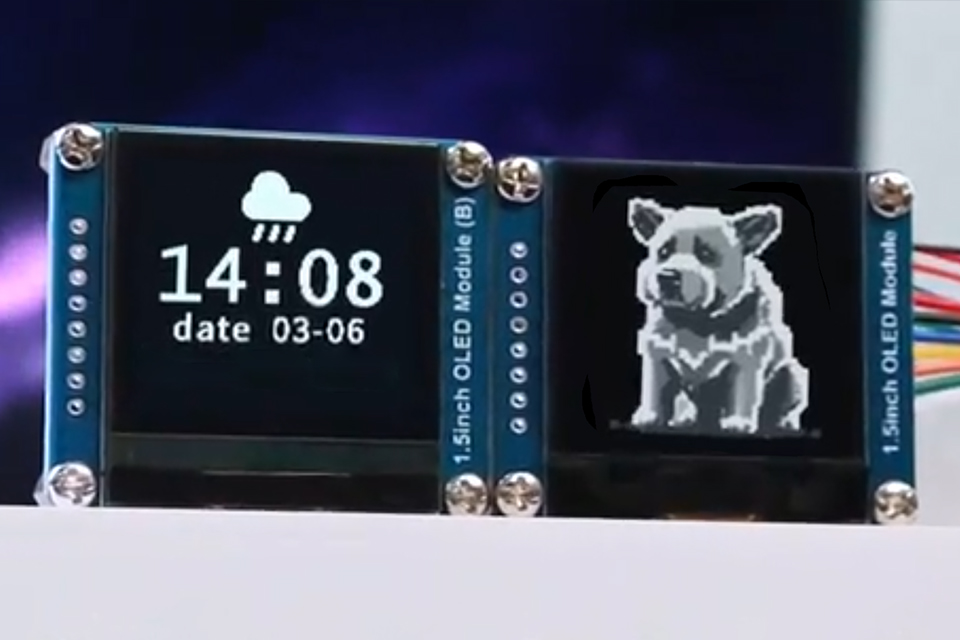
| 128×64 | 128×64 = 8,192 | 2:1 | 0.96″, 1.3″, 1.5″ | Text, icons, simple graphics, status indicators, menus |
| 128×32 | 128×32 = 4,096 | 4:1 | 0.91″ | Small amount of text, simple icons, status indicators |
| 128×128 | 128×128 = 16,384 | 1:1 | 1.5″ | More complex graphics, larger amounts of text, graphical elements that benefit from a square format |
The choice of resolution depends on the specific needs of your project. Consider factors such as the amount of information you need to display, the desired level of detail, and the physical size constraints of your device. You might also consider resolution of 128×128 pixels.
Adafruit Industries has played a significant role in making OLED display technology more accessible to hobbyists, makers, and developers. They offer a wide range of OLED display modules, kits, and accessories, along with excellent documentation and support. One of Adafruit’s key contributions is the development of open-source libraries that simplify the process of interfacing OLED displays with microcontrollers like the Arduino.
The Adafruit SSD1306 library is specifically designed for OLED displays based on the SSD1306 controller. It provides a set of functions for controlling various aspects of the display, including:
In addition to the SSD1306 library, Adafruit also provides the Adafruit GFX library, which is a more general-purpose graphics library that supports a wide range of displays, including OLEDs. The GFX library provides a consistent set of graphics functions that work across different display types, making it easier to port code between projects.
Adafruit also offers OLED display kits that bundle together an OLED display module with other necessary components, such as a breakout board, header pins, and sometimes even an Arduino. These kits are a convenient way to get started with OLED displays, as they provide everything you need in one package. You can also buy them separately in our store.
When working with OLED displays, you’ll encounter two main types: monochrome and RGB. Understanding the differences between these types is essential for choosing the right display for your project.
| Feature | Monochrome OLED | RGB OLED |
|---|---|---|
| Colors | Single color (e.g., white, blue, yellow, green) + black | Wide range of colors created by combining red, green, and blue |
| Complexity | Simpler to control | More complex to control |
| Data Lines | Typically fewer data lines required | More data lines required |
| Processing | Lower processing power needed | Higher processing power needed |
| Applications | Text, icons, simple graphics, status displays, menus | Images, videos, complex graphics, applications where color is essential |
| Controllers | Often uses controllers like SSD1306 | Typically uses different controllers than monochrome versions |
| Brightness | Can be brighter than RGB due to the lack of need for color filters which can reduce light transmission | May have slightly lower brightness compared to monochrome due to the need for color filters that can reduce light transmission |
The choice between a monochrome and an RGB OLED display depends on the specific needs of your project. If you need a simple, low-power display for text and basic graphics, a monochrome OLED is likely the better choice. If you need to display full-color images or require a more visually engaging user interface, an RGB OLED is the way to go.
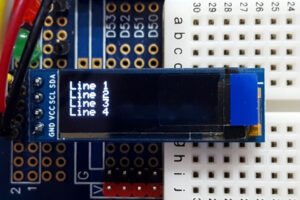
Displaying text and graphics on an OLED screen involves sending specific commands and data to the display controller. The exact process depends on the specific controller and the library you’re using, but the general principles are similar. Let’s focus on using the popular Adafruit SSD1306 and Adafruit GFX libraries with an Arduino.
Displaying Text:
setTextSize() and set the text color using setTextColor(). Remember that monochrome OLED displays can only display one color at a time.setCursor(x, y) function to specify where you want the text to start. The x and y coordinates represent the top-left corner of the first character.print() or println() functions to send the text to the display. The text will be rendered using the currently selected font and size.Displaying Graphics:
drawPixel(x, y, color) function to set the color of a specific pixel on the screen.drawLine(x0, y0, x1, y1, color) function to draw a line between two points.drawRect(), fillRect()) and circles (drawCircle(), fillCircle()). You need to specify the coordinates of the top-left corner, the width and height (for rectangles), the radius (for circles), and the color.drawBitmap() to display the image on the OLED.Remember that OLED displays, especially smaller ones, have limited memory. You may not be able to store large, complex images directly in the display’s memory. In such cases, you might need to stream the image data from the microcontroller or use techniques like RAM buffering to manage the display content. It’s important to consult the documentation for your specific OLED display and library to understand the available functions and their limitations.
Powering an OLED display module requires careful consideration of voltage, current, and overall power consumption, especially when designing battery-powered devices. Here are some key factors to keep in mind:
When designing a battery-powered device with an OLED display, it’s essential to choose a battery with sufficient capacity to meet the display’s power requirements, along with the power needs of other components in your system. You should also consider implementing power-saving measures, such as turning off the display when not in use or using a sleep mode to minimize power consumption during periods of inactivity.
While Arduino is a popular platform for interfacing with OLED displays, these versatile displays can also be used with other platforms like the Raspberry Pi and various microcontrollers.
Raspberry Pi:
The Raspberry Pi is a powerful single-board computer that is often used in projects requiring more processing power or connectivity options than an Arduino can provide. You can connect an OLED display to a Raspberry Pi using either the I2C or SPI interface, similar to how you would connect it to an Arduino.
Here are the general steps for using an OLED display with a Raspberry Pi:
raspi-config utility or by manually editing the configuration files. You can find dedicated sensor kit documentation to do that.luma.oled library. You can install these libraries using the pip package manager.Other Platforms:
In addition to Arduino and Raspberry Pi, you can use OLED displays with a wide range of other microcontrollers and single-board computers. The specific steps for interfacing the display will vary depending on the platform and the chosen interface (I2C or SPI).
Here are some general guidelines for using OLED displays with other platforms:
With the increasing availability of libraries and resources for different platforms, using OLED displays in various projects has become more accessible than ever before.
OLED display modules are becoming increasingly available from various online retailers, electronics suppliers, and specialized vendors. Here are some popular places to find OLED display modules:
When buying an OLED display module, consider the following factors:
By considering these factors, you can find the right OLED display module for your project and create visually stunning and interactive devices.
This comprehensive guide has explored the fascinating world of OLED graphic display modules, from their underlying technology to practical considerations for using them in your projects. Whether you’re a hobbyist, a maker, or an engineer, OLED displays offer a powerful and visually stunning way to enhance your creations. As OLED technology continues to evolve, we can expect even more exciting developments in the future, such as larger, higher-resolution displays, improved flexible and transparent OLEDs, and further integration into various devices and applications. You can install our kit and explore the world of OLED technology, also using sensor kit documentation.

This article dives into the world of Thin-Film Transistor (TFT) LCD display modules, exploring their technology, advantages, and diverse applications.
This article delves into the fascinating world of LCD modules, specifically focusing on their integration with Arduino and the capabilities of TFT LCD technology.

This article dives deep into the world of 0.96 inch OLED display modules, specifically focusing on the 128×64 resolution variant that communicates via the I2C interface.

This article dives deep into the fascinating world of microdisplays, focusing specifically on the groundbreaking 4K OLED technology developed by Sony Semiconductor Solutions.
This article delves into the world of compact OLED display modules, specifically focusing on the 0.91 inch 128×32 OLED display that utilizes the I2C interface.
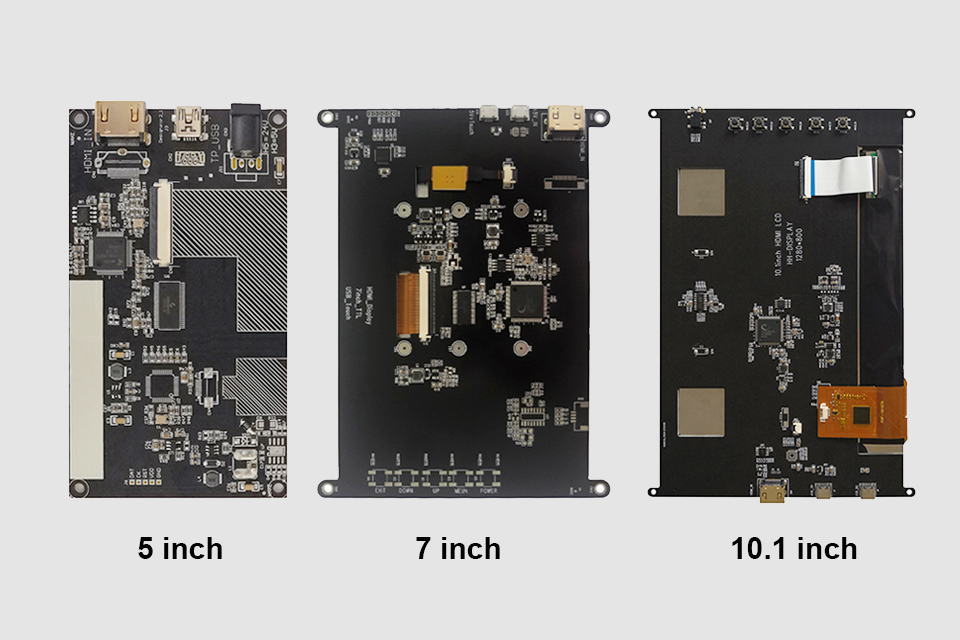
This article explores how to connect an LCD screen to a Raspberry Pi using an HDMI driver board, essentially turning your single-board computer into a miniature HDMI monitor.

This article dives into the exciting world of augmented reality (ar) lenses, specifically focusing on the development and potential of an interchangeable lens system for ar glasses.

This article dives deep into the lifespan and durability of OLED (Organic Light Emitting Diode) displays compared to LCD (Liquid Crystal Display) screens.